Step by Step on making a Christmas Door Wreath

How to make your own christmas door wreath

A step by step guide on how to make your own Christmas door wreath.

By Dutch Master Florist – Lamber de Bie

Decorate the door to your home with your own home made Christmas door wreath with a fools proof step by step guide by Dutch-Master-Florist, Lamber de Bie.

A beautiful wreath hanging from your front door is a wonderful welcome to all your family, friends and neighbors that will visit you over the festive christmas season.

With this easy to follow guide, anyone can make a magnificent door wreath and be the envy of all your neighbors.

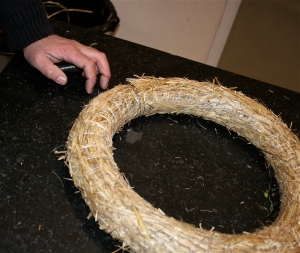
There are a number of different base wreaths available to start making your own christmas wreath; You can use a metal frame that you can cover with moss or straw or even directly with noble fir, but the easiest option is to buy a ready made straw wreath base.

These straw bases are widely available from your florist or garden centre in a variety of seizes and are an in-expensive option. Make sure you choose an suitable size for your front door. Remember the finished door wreath will be approx. 3 to 4 inches wider after you add on the Noble Fir.

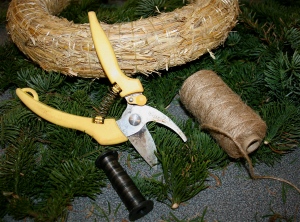
Next you need to get some fresh Noblis fir that you can get from your florist or garden centre and a hobby secretaurs and a roll of florist binding wire. A roll of garden twine can be used as a substitute for the wire.

What you need to make a christmas door wreath

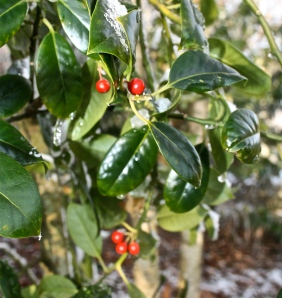
Next we need to get some Holly with berries from the garden. However this evergreen Holly from my garden did not produce many berries this year and would also blend in to much with the green fir.

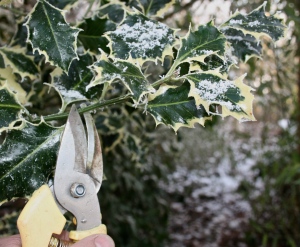
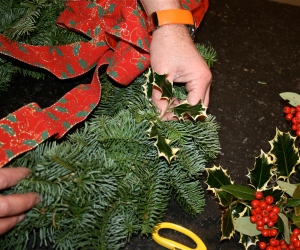
So I decide to cut some tips from this variegated Holly from my garden.

In order to grow a nice and compact Holly bush it is good to cut the tips of the branches every year, so your doing some important work to your garden at the same time.

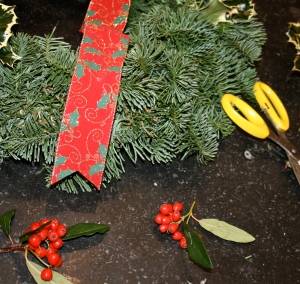
Now we still have no berries on our Holly. So I decide to take some berries from my Cotoneaster bush. If you can’t find any berries in your garden you can always buy some artificial red berries from your local flower shop or garden centre.

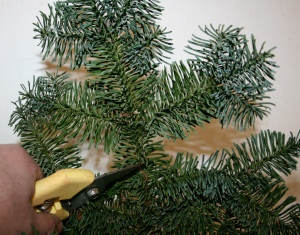
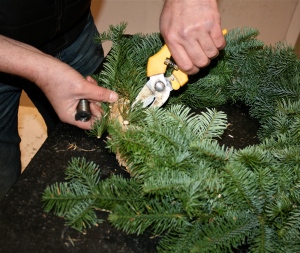
Before we start with the making of our wreath we first have to cut our Noblis Fir branch into small twigs. Starting from the top of your branch (as in photo below)  cut off all the nice tips at approx. 4 inches long. You will need 2 to 3 large branches for an average door wreath.

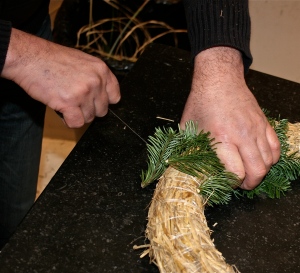
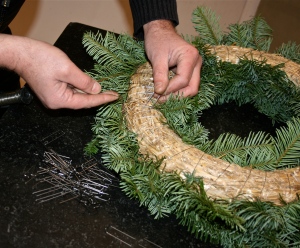
Now we start with tying the florist wire firmly to your base, make sure the wire is wrapped over the wreath and from the centre of the wreath under the wreath back towards you.

Place the first of your noble fir on your wreath holding it in place with one hand. Start with the larger pieces on the outside and the smaller pieces on the inside of the wreath. All branches need to be pointing in the same direction facing up.

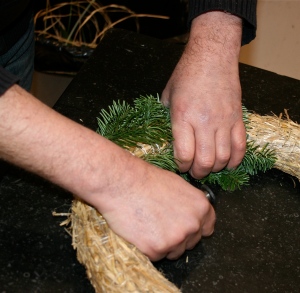
Next while still holding the branches with your same hand lift the wire over the wreath with your other hand and than bring the wire back towards you underneath the wreath. Keep your wire tight at all time and pull the wire firmly do your branches are tightly attached.

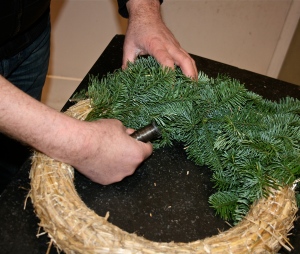
Keep repeating this process while still covering the cut end of the previously added twigs with the tops of the next layer, moving forward on the wreath by approx 2 inches every time. Remember to always lay every branch in the same direction.

When you are almost at the end -or where you began- you may have to cut the bottom of your stems so only the nice tops are viable.

Now secure the end of your florist wire with a so called “German Pin” These can be got from your florist, garden centre or hobby shop.

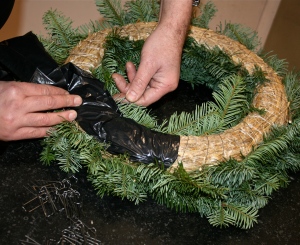
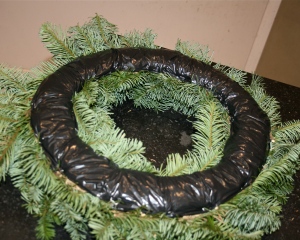
If you are hanging your wreath outside on your door or if you are making a wreath to put onto your table you can protect your door or table from rust and scratching by the wire by covering the the back of your wreath by a ribbon of plastic. Cutting a strip from a black bin liner works perfect.

Use the “German pins” on the inside and outside to secure your plastic protection.

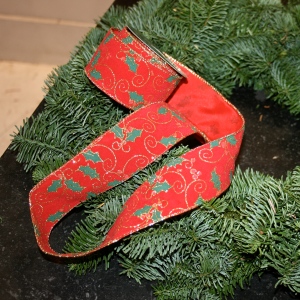
Time to start decorating. First choose a nice christmas ribbon. Make sure it is a waterproof and wire-edged ribbon. The wire edge helps you to shape your bow and keep it looking well over the festive season.

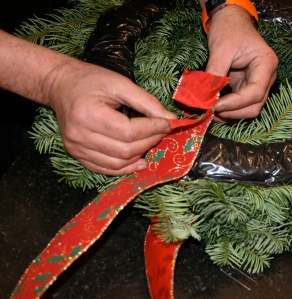
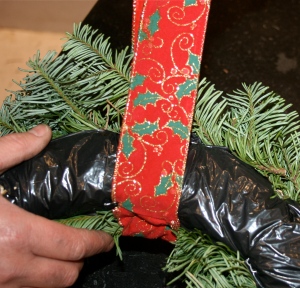
We are first attaching a piece of ribbon that we will use later to hang the wreath from your door. Use approx 1 meter of ribbon, bring it around the inside of your wreath with the ends together at the back of the base.

Fold the ends together and attach the ribbon to your wreath using 2 “German Pins”. Keep the pins on the inside (not right at the back) to avoid scratching surfaces to your door.

This is how it should look from the front.

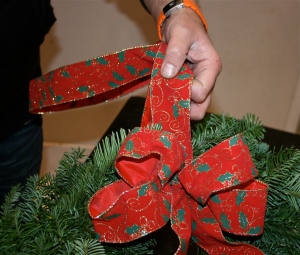
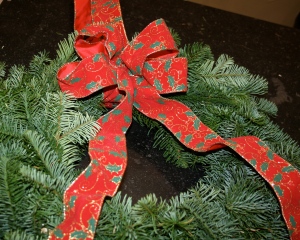
Now it’s time for the bow. Cut about 2 meter of ribbon and hold it in the middle lying over your index finger with your thumb holding it on the top. Now while holding the ribbon between thumb and index finger with your other hand fold the ribbon underneath itself , keeping your thumb in position and sliding the fold over your index finger and under neath the centre of the ribbon.  I hope this makes cense and I’m not making it sound more complicated than it really is. Next repeat this step with the other end of the ribbon and you should now have two loops as on the photo below. Repeat both steps to create your double bow.

When your bow is complete tie is in the centre tightly with a florist wire. Use this wire to tie your bow to the wreath over the ribbon you attached earlier to hang your wreath from.

Lay the straps of your bow across the wreath roughly dividing the wreath into 3 parts.

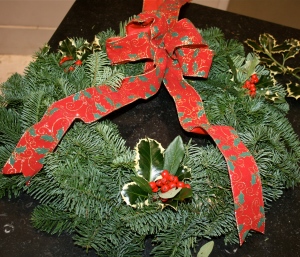
Now add small branches of Holly by pushing the ends into the straw base or by using the “German Pins”. Place two pieces, one on either side beside the bow and one piece at the bottom opposite the bow, again dividing the wreath into 3 sections.

Make sure you cut the ends of  your ribbon in a neat way just over the edge of your wreath. The easiest way to do this is by folding the ribbon lengthwise in half and than cutting it at an angle.

Now add small bunches of berries into the centre of your holly. The “German Pins” are the easiest way to do this.

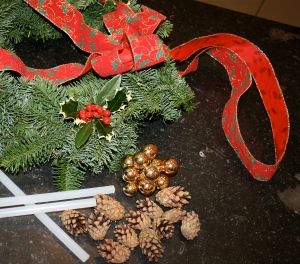
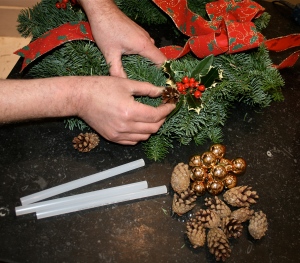
Next we need to choose the rest of our decorations. For this wreath I have chosen 9 small natural cones and a small bunch of gold, glass baubles. I am using a hot-glue gun to add all these following decorations to my wreath. These glue guns can be bought from hobby shops and some DIY shops. Alternatively you can attach a florist wire to each decoration and push the wire into your straw base.

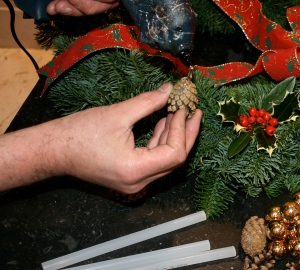
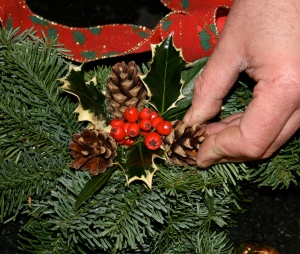
Be careful using your hot glue gun as this gets very, very hot to melt the glue.( do keep away from kids ) Add some glue to your cones and push into place and hold for upto 10 seconds.

Place the cones at the base of the Holly leaves, creating 3 neat clusters on your wreath.

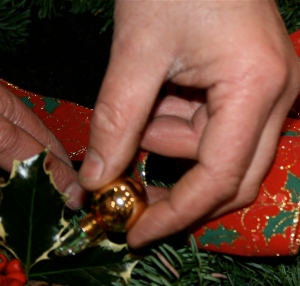
Repeat the same with your gold baubles.

And this the finished product, you own christmas door wreath. When attaching the wreath to your door you can use a heavy duty staple gun to staple the ribbon to the top of your door, when your door is open so after christmas there are no markings on your door.

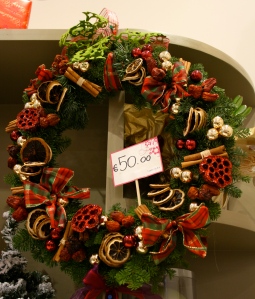
Here’s some examples of christmas door wreaths we have made for our customers at Lamber de Bie Flowers.

Door wreath with cinnamon sticks and dried fruits.

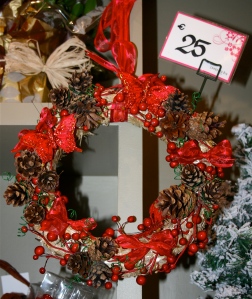
Wreath with natural cones, artificial red berries and red ribbon.

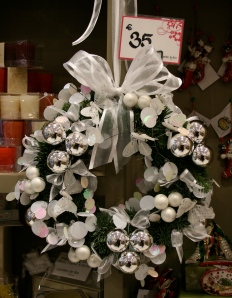
Elegant door wreath with white and silver decorations and white ribbon.

Hope you have fun making your own christmas door wreath and please leave a message to this post telling me how you got on.

For a look at the full range of Christmas flowers by Lamber de Bie Flowers, click on the picture below.

Happy Decorating from

Lamber de Bie

Dutch Master Florist

and all the team of Florists at Lamber de Bie Flowers

www.lamberdebie.ie


Wedding Trends 2011

Wedding Trends – 2011 – A Vintage Year

Vintage style bridal bouquet
Vintage style bridal bouquet in pinks and purple

Spending almost every sunday in January & February at wedding fairs in different hotels in the South-East in Ireland may result in aching feet and a sore throat, but it certainly is a fantastic way of getting up to speed with current wedding trends, as Lamber de Bie (Lamber de Bie Flowers) found out.

The main season for all the wedding fairs in the South-East of Ireland is always in the first two months of the year. Lamber and his team are attending wedding fairs in both Waterford and Kilkenny almost every Sunday during this time. Some of the hotels that Lamber de Bie Flowers were attending are; The Newpark Hotel, Kilkenny, Waterford Castle Hotel, Waterford, Langtons Hotel, Kilkenny, Woodlands Hotel, Waterford, Ormonde Hotel, Kilkenny, The Step House Hotel, Borris, Co. Carlow, The Lord Bagenal, Loughlinbridge, Co. Carlow, and many more. At the many wedding shows the wedding suppliers showcase everything that is current and ‘Must Have’ for prospective brides to be. Including an incredible selection of wedding dresses. Indeed the focus of the majority of the brides was the bridal fashion shows, which provided an ideal opportunity to have a sneak preview of what’s in fashion. Big skirts are very much ‘in’ but bodices remain fitted, and in the majority of cases, strapless. There is less intricate beading and glitz about. This seems to have been replaced instead by trails and fabric embellishments.

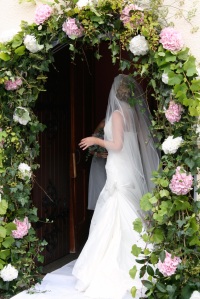
Vintage style wedding arch
Vintage style wedding arch at entrance to the church

And as for colour and styles, well vintage is without doubt the buzz word for weddings this year.

So what sums up a vintage themed wedding? Colour-wise: cream, ivory (never white) and all shades of pinks from pale to dusky with a splash of cerise. Green is also popular, particularly olive green and the soft grey/green of eucalyptus. Overall the look could be described as cottage garden, very flowery, natural and pretty.

Reception designs seem to fall into two groups, quirky or elegant. For quirky it’s ceramic jugs and pitchers, individual glass vases, bone china cups and saucers. A sort of mix and match, church hall/ marquee on the village green type of feel. On the elegant front, brides at the show loved the tall glass martini vases, filled with water and roses petals (in vintage pink of course). Storm lanterns and decorate birdcages also seemed to tick a lot of the boxes with many brides who were looking for a variety of designs for the reception, rather than repeating the same one all the way trough.

A contrast from the vintage muted shades is purple, a colour witch looks to be big over the next couple of years. A top table of trailing amaranthus and purple vanda orchids was one of the most popular items on display. – one bride even took her bridesmaids shoes out of the box so she could match them up (they went perfectly).

So to sum up the wedding look for 2011/12 – well, it’s very flowery, which is great for florists, with lots of pastel shades and natural greens accented with splashes of purple.

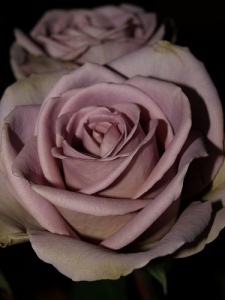
Amnesia wedding rose
Amnesia rose

Flower-wise, roses are going to be even bigger this year, in particular the more (and it’s that word again) vintage colours, such as Amnesia, Hypnose, and Amalia should fit the bill.

Away from roses, hydrangeas continue the cottage garden theme, along with delphiniums, gladioli and for something a little more up-market for the bridal bouquet, vanda orchids.

Who would have thought that just a couple of Sundays at the different wedding events in the south east of Ireland could provide you with such valuable insights!

http://www.lamberdebie.ie
Lamber de Bie Flowers are based in both Waterford and Kilkenny, Ireland and can be contacted trough their website; http://www.lamberdebie.ie
How to make a Christmas Door Wreath

How to make your own christmas door wreath

By Dutch Master Florist – Lamber de Bie


Decorate the door to your home with your own home made Christmas door wreath with a fools proof step by step guide by Dutch-Master-Florist, Lamber de Bie.


A beautiful wreath hanging from your front door is a wonderful welcome to all your family, friends and neighbors that will visit you over the festive christmas season.

With this easy to follow guide, anyone can make a magnificent door wreath and be the envy of all your neighbors.

There are a number of different base wreaths available to start making your own christmas wreath; You can use a metal frame that you can cover with moss or straw or even directly with noble fir, but the easiest option is to buy a ready made straw wreath base.

These straw bases are widely available from your florist or garden centre in a variety of seizes and are an in-expensive option. Make sure you choose an suitable size for your front door. Remember the finished door wreath will be approx. 3 to 4 inches wider after you add on the Noble Fir.


Next you need to get some fresh Noblis fir that you can get from your florist or garden centre and a hobby secretaurs and a roll of florist binding wire. A roll of garden twine can be used as a substitute for the wire.

What you need to make a christmas door wreath


Next we need to get some Holly with berries from the garden. However this evergreen Holly from my garden did not produce many berries this year and would also blend in to much with the green fir.


So I decide to cut some tips from this variegated Holly from my garden.

In order to grow a nice and compact Holly bush it is good to cut the tips of the branches every year, so your doing some important work to your garden at the same time.


Now we still have no berries on our Holly. So I decide to take some berries from my Cotoneaster bush. If you can’t find any berries in your garden you can always buy some artificial red berries from your local flower shop or garden centre.


Before we start with the making of our wreath we first have to cut our Noblis Fir branch into small twigs. Starting from the top of your branch (as in photo below)  cut off all the nice tips at approx. 4 inches long. You will need 2 to 3 large branches for an average door wreath.


Now we start with tying the florist wire firmly to your base, make sure the wire is wrapped over the wreath and from the centre of the wreath under the wreath back towards you.


Place the first of your noble fir on your wreath holding it in place with one hand. Start with the larger pieces on the outside and the smaller pieces on the inside of the wreath. All branches need to be pointing in the same direction facing up.

Next while still holding the branches with your same hand lift the wire over the wreath with your other hand and than bring the wire back towards you underneath the wreath. Keep your wire tight at all time and pull the wire firmly do your branches are tightly attached.


Keep repeating this process while still covering the cut end of the previously added twigs with the tops of the next layer, moving forward on the wreath by approx 2 inches every time. Remember to always lay every branch in the same direction.


When you are almost at the end -or where you began- you may have to cut the bottom of your stems so only the nice tops are viable.

Now secure the end of your florist wire with a so called “German Pin” These can be got from your florist, garden centre or hobby shop.


If you are hanging your wreath outside on your door or if you are making a wreath to put onto your table you can protect your door or table from rust and scratching by the wire by covering the the back of your wreath by a ribbon of plastic. Cutting a strip from a black bin liner works perfect.


Use the “German pins” on the inside and outside to secure your plastic protection.

Time to start decorating. First choose a nice christmas ribbon. Make sure it is a waterproof and wire-edged ribbon. The wire edge helps you to shape your bow and keep it looking well over the festive season.

We are first attaching a piece of ribbon that we will use later to hang the wreath from your door. Use approx 1 meter of ribbon, bring it around the inside of your wreath with the ends together at the back of the base.

Fold the ends together and attach the ribbon to your wreath using 2 “German Pins”. Keep the pins on the inside (not right at the back) to avoid scratching surfaces to your door.


This is how it should look from the front.

Now it’s time for the bow. Cut about 2 meter of ribbon and hold it in the middle lying over your index finger with your thumb holding it on the top. Now while holding the ribbon between thumb and index finger with your other hand fold the ribbon underneath itself , keeping your thumb in position and sliding the fold over your index finger and under neath the centre of the ribbon.  I hope this makes cense and I’m not making it sound more complicated than it really is. Next repeat this step with the other end of the ribbon and you should now have two loops as on the photo below. Repeat both steps to create your double bow.


When your bow is complete tie is in the centre tightly with a florist wire. Use this wire to tie your bow to the wreath over the ribbon you attached earlier to hang your wreath from.


Lay the straps of your bow across the wreath roughly dividing the wreath into 3 parts.


Now add small branches of Holly by pushing the ends into the straw base or by using the “German Pins”. Place two pieces, one on either side beside the bow and one piece at the bottom opposite the bow, again dividing the wreath into 3 sections.


Make sure you cut the ends of  your ribbon in a neat way just over the edge of your wreath. The easiest way to do this is by folding the ribbon lengthwise in half and than cutting it at an angle.


Now add small bunches of berries into the centre of your holly. The “German Pins” are the easiest way to do this.


Next we need to choose the rest of our decorations. For this wreath I have chosen 9 small natural cones and a small bunch of gold, glass baubles. I am using a hot-glue gun to add all these following decorations to my wreath. These glue guns can be bought from hobby shops and some DIY shops. Alternatively you can attach a florist wire to each decoration and push the wire into your straw base.


Be careful using your hot glue gun as this gets very, very hot to melt the glue.( do keep away from kids ) Add some glue to your cones and push into place and hold for upto 10 seconds.


Place the cones at the base of the Holly leaves, creating 3 neat clusters on your wreath.


Repeat the same with your gold baubles.


And this the finished product, you own christmas door wreath. When attaching the wreath to your door you can use a heavy duty staple gun to staple the ribbon to the top of your door, when your door is open so after christmas there are no markings on your door.


Here’s some examples of christmas door wreaths we have made for our customers at Lamber de Bie Flowers.

Door wreath with cinnamon sticks and dried fruits.

Wreath with natural cones, artificial red berries and red ribbon.

Elegant door wreath with white and silver decorations and white ribbon.


Hope you have fun making your own christmas door wreath and please leave a message to this post telling me how you got on.


For a look at the full range of Christmas flower by Lamber de Bie Flowers, click on the picture below.


Happy Christmas

Lamber de Bie

Dutch Master Florist

http://www.lamberdebie.ie